I've shown previously how to fade a single edge of an image with GIMP. That's a cool effect, but sometimes you want to fade all of the edges of an image. So today I'm going to show you how to fade all of the edges of an image.
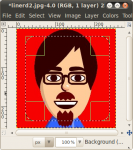
I'll start with an image of my avatar. I've changed the background to red to help make the effect stand out.
Let's get started.
- Open your image in GIMP and choose the Rectangle Select Tool.
- In the Tool Options Dialog, select Rounded Corners and choose a radius for the corners. For this image, I'm using a radius of 25 pixels.
- Select the portion of the image you want to keep by dragging a rectangle in the graphics window.
- At this point you can adjust the radius of the corners if you like.
- Now go to the menu and choose Select->Invert.
- Go to the menu again and choose Select->Feather. A window will pop up for you to choose the amount to feather the selection. This will control how much of the image will be faded out. For this example I'm using 50 pixels.
- Now to create the fade, just hit the Delete key on your keyboard or select Edit->Clear.
Your edge fade effect is now complete. Just save your image under a new name and you're done.

You can, of course, try different selection shapes and different feather amounts to adjust your effect. Get creative.


#
Wonderful article. Simple steps and yet effective. Thank you!
#
Hii,
And if I like an Ellipse border to be gaded?
#
Works great if you want white but I want to keep the black background and fade the image into black.
#
Create another layer, fill it with black, and set it to be the background layer.
#
Just change the bg color
#
thank you! thank you! thank you!
#
7 years later, still very helpful! Thanks
#
It was helpful, thank you.
#
This didn't quite work for me. I found that if I select the image, then invert the selection, then feather, the feathering applies only to areas outside the image. Applying "Feather" after inverting the selection makes the selection boundaries draw away from the image (toward the inside of the inverted selection). Then, the fading applied by "Delete" applies only (or mostly) to the area outside, and barely touches the image.
However, applying "Feather" before inverting the selection works:
1. Select the image. *
2. While the image is selected, apply Select -> Feather. The selection boundary draws inward toward the center of the image.
3. Invert the selection. The area outside the image and the image's edges are selected.
4. Press "Delete". That fades the edges if the image, which are now within the inverted selection. Pressing "Delete" multiple times fades the edges even more.
* It's worth pointing out that if you have an irregularly shaped image surrounded by whitespace, you can select the image by selecting the white area around the image with the magic wand, then inverting the selection, enclosing the image. After that, proceed to the remaining steps: apply "Feather" while the image is selected, invert the selection again, and then hit "Delete".
#