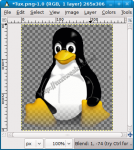
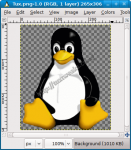
There's no need to go out and buy Adobe Photoshop and take Photoshop classes. Just follow this simple GIMP tutorial to learn how to fade out the edge of an image.
One of the features that gives images a web 2.0 kind of look is fading out the edges. This is most commonly seen in the image reflection effects. I'm not going to cover a reflection in this post. I'll just cover the image fade out part for now.
I'm going to start out with an image of our favorite Linux mascot, Tux. I've already trimmed out the white background and made it transparent.
Add a Layer Mask
- Open up the Layers menu [CTRL][L]. If you're opening just a basic jpeg or png there should be just one layer at this point.
- In the Layers menu, right click on the layer and select Add Layer Mask.
- Make sure White (full opacity) is selected and click Add. You should see a white box show up next to the thumbnail of your image in the Layers menu.
Create the Fade Effect
- Right click on your layer and make sure that Edit Layer Mask is selected.
- Make sure that the Foreground Color is set to Black and the Background Color is set to White in the GIMP tools menu.
- Click on the Blend Tool (it should be just to the right of Bucket Fill).
- Drag a vertical line from the bottom of the image to where you want to stop the fade effect. (Hint: Hold down the [CTRL] key to help make the line vertical.)
If you right click in the Layers menu, you can select Show Layer Mask. It should look something like this:

Right click again and select Apply Layer Mask.

You can now save your file. In the image window select File?Save As. Enter a new name and click Save. A menu will pop up with save options. The defaults should be fine. Click Save.
Here's the final product.


#
Fantastic! Thanks. (make sure FG=Black BG=White saved me)
#
NOPE. Didn't work. Tried it twice and instead of fading the photo to black it faded to transparent which doesn't help.
#
After doing the fade to transparent, create a new layer and fill it with black. Move the new black layer up in they layer list to make it the background and you should have the effect you are looking for.
#
What if one wants to fade to other side of the image too? Like say the upper side and keep the lower fade intact. I tried it but it did not work with this same procedure. The scond time I want to use Blend it overruns the first one despite adding another layer..
#
Still doesn't work
#
Perfect! Thank you.
#
THANK YOU! Also, advice for anyone who can't seem to get it to work, even though they follow all the steps is to make sure that it is saved as a .png file!
#
Absolutely, make sure you export to a format that supports transparency.
#
thanks for the tut, nice and helpful, cheers!
#
thanks, I'll try, newbie and all that 🙂
#
how do you fade the background to the exact same colour as the body, please? 🙂
#
I'm not sure I understand your question, but you can use this technique and then create a new background layer and fill it with any color you want.
#
I'm trying to fade the bottom same as your info but instead of white, I need the colour to be the same as the body of my website which is 818181.was hoping you had a quick tutorial somewhere, but thanks anyway.
#
This tutorial is actually showing how to fade the image to transparency. So as long as you save it to a format that supports transparency, like PNG, then whatever color is behind it will show through. JPG does not support transarency, so don't use that. The image in my site header was done in the same way as this tutorial. You can see how the checkerboard pattern shows through in my 3rd image. That checkerboard represents the transparent background in GIMP.
You could download my final image, (right click and save), and place it on your page as an example to see how it looks.
Give it a try, I think you'll find that you can do what you want with this tutorial. 🙂
#
Brilliant guide! Thanks so much. I've always wanted to be able to do this and you taught me how in 5 mins!
#
You are quite welcome. I'm glad you found it helpful.
#
Brilliant! Saved me loads of messing about trying to achieve this effect on a couple of images.
All I need to do now is actually understand the steps rather than just doing them! 😉
#
Never works,never will... #### computers forever!!!!!!!!!!!!!!!!!!
#
For some reason I can't get it to work. If you save the .xcf file as a .gif, it should still retain the transparent layer, right? But when I try to save it as a gif image it loses the transparency. Anyone know how I can fix that?
#
Oh, nvm, it works if you save it as a .png file 🙂
#
Great Tutorial. I was searching a lot on Google and finally just what I was looking for. Thanks a lot
#
Thanks for this precise tutorial.
#
A VERY easy way to fade out from an elliptical view of a picture:
Open a picture that you want to use (jpeg - I'm not sure about other formats)
Layer-> Add Layer Mask (White - Full Opacity)
Ellipse Select (select the area you want to use)
Bucket Fill (black foreground, White background) into the ellipsed area
Rectangular Select (to encompass the outermost edges of the fade-out)
Colors -> Invert
Filter -> Blur -> Gaussian Blur (IIR) (I like to use a setting of 150)
Layer -> Mask -> Apply Layer Mask
Copy
Paste onto the Gimp page you will use.
#
Thanks for the quick tip. For fading all around, I use this technique: http://tuxtweaks.com/2010/06/how-to-fade-the-edges-of-images-with-gimp/
#
thank you Michael! clear and simple and helpful
#
Hey I was frustrated. All I wanted to do is fade the image (make it faint) so i could put text over it, as in use it for a background in a text document. I'm new to gimp and I was just fooling around and discovered that if you go to colors, then click on levels, it gives you a couple of sliders labeled input and output. By messing with them I was able to fade the image just like I wanted to. I just thought this might be a simple, helpful solution for some others out there who are wanting to do the same thing.
#
Thanks for the quick tip!
#
Awesome! Thanks for sharing this simple tutorial!
#
This worked like a charm, and it was really easy. I was working with multiple layers, and it was still pretty cool to do. Thanks!
#
thank you for the post. It help me saved a lot of time figuring out how to do this thing. much mahalo!
#
This is so simple and helpful - exactly what tutorials should be! Thanks for sharing.
#
I'm so glad I found this tutorial. Extremely helpful!
Like others here, I've plagued myself with other instructions (including Gimp's own) and was getting nowhere.
Good stuff !
#
Thanks - this is exactly what I was looking for !!!
#
THANK YOU. I have been following two other sets of instructions for more than an hour with no results. I used your tutorial and created the effect I needed in less than five minutes. You rock!
#
Glad I could help. I'm no GIMP pro myself, so I wanted to document the process so I could refer to it myself.
#
This is the simplest, best guide I have found yet, to create this cool effect. You are the man...
#
@Terry- Thanks for the compliment. I try to keep things simple.
#
But how do u get the edge all around the figure faded.??
i tryed to but a eye in another picture, i whanted it to be like a watermark in the background.. but when i did a manual fade like painting with spray it leaves a edge...
#
Try here:
http://helpsetmaker.sourceforge.net/tutorial/doc6.html
it has the little face spray edge thing, but i dont know if this is exactly what your looking for 🙂
#
My hero 🙂
#
Thank you so much Ive been trying to do this for hours.
#